When you ask a Windows user what software they use to run a PHP file? Undoubtedly, they will say XAMPP server. Indeed XAMPP server is the best way to run PHP files on a windows machine but in Linux. We can use the same software or a LAMP server to achieve the same results.
A XAMPP server is a cross-platform software, which means you can run this application on any Operating system bundled with Apache, MariaDB, PHP, and Perl. XAMPP server provides you the feasibility to run and test your file before deploying it to a remote server.
Moreover, XAMPP server is more common around windows and college students to run their projects.
In this guide, we will share with you how to install XAMPP on ubuntu 20.04. Follow the step.
Prerequiste
- Ubuntu 20.04 Focal Fossa
- A user with sudo privileges
- Access to a terminal/command line
- The apt the tool, pre-loaded in Ubuntu and other Debian-based distros
Step 1: Download Package from Official Site
The first step is to download the package from the official site. To download the package, click on this link XAMPP package.
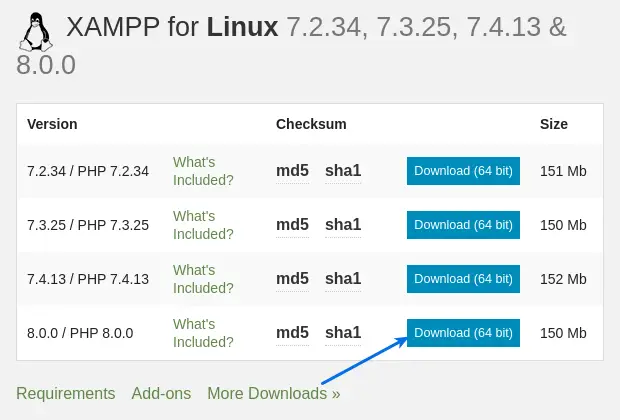
Once the page loads, go to the Linux Section and select the PHP version as per your requirement. I’ll download the latest version of PHP, which is 8.0.0.
To start downloading, click on “Download(64 bit)”.
While downloading, you may get a warning from chrome “The type of file can harm your computer. Do you want to keep xampp-linux.x64…run anyway?”, relax, nothing will happen to your system, please click on Keep to continue.

OR
If you want to download XAMPP from the terminal, then pass the below command and wait until the file gets downloaded.
At the time of writing, this article’s latest version of PHP is 8.0.0. To get a newer version of PHP, go to the official page and scroll to the Linux section. After that, please copy the link address and replace it with the below link.
$ wget https://www.apachefriends.org/xampp-files/8.0.0/xampp-linux-x64-8.0.0-2-installer.runStep 2: Change Package Permission
After downloading the file, you need to provide executable permission. Otherwise, you will not be able to run it. To provide executable permission, follow the below steps.
Steps to change the permission
If you have followed the first step to download the XAMPP package, then you need to open a terminal and go to the directory where the xampp package exists. If you are relatively new to Linux, use cd command to change a current directory.
For me, the file is stored in the Download directory.
$ cd Downloads/Now make the XAMPP package as an executable file using a chmod command. To change permission, pass the below command and ensure to replace a file name with a correct one.
It will prompt you to enter sudo password, so please enter it.
$ sudo chmod 755 xampp-linux-x64-8.0.0-2-installer.run Once the permission is modified, you will see x in permission attributes, and the file color turns into a green which confirms that permission is modified successfully.
$ ls - l xampp-linux-x64-8.0.0-2-installer.run

-rwxr-xr-x 1 trendoceans trendoceans 161099226 Jan  4 15:31 xampp-linux-x64-8.0.0-2-installer.run*
Step 3: Run and Install XAMPP Package
After making the file executable, we will now start the installation process for this pass the below command in the same terminal.
Whenever you run any application from bash, use ./ and package name.
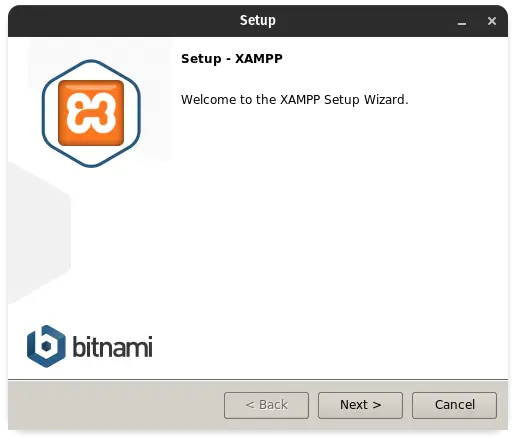
$ sudo ./xampp-linux-x64-8.0.0-2-installer.run - For the first time, you will see the bitnami splash image after that you will see XAMPP Setup Wizard and click on the Next Button.
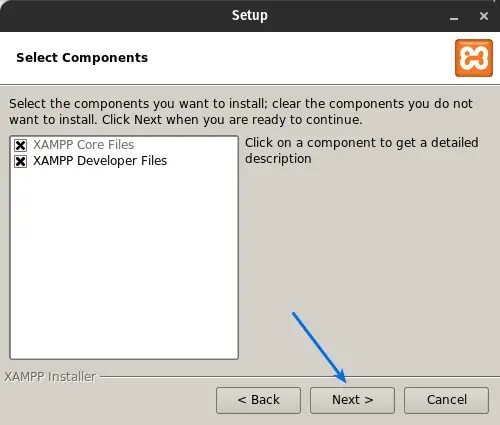
- Keep all the options default and click on the Next button. If you want to uncheck XAMPP Developer files you can uncheck. but I’ll not advise you to do because the following components hold important files.
- XAMPP Core Files includes Apache,MySQL,PHP,Perl and their required dependenices, XAMPP Developer Files has manual, documents and share folder.
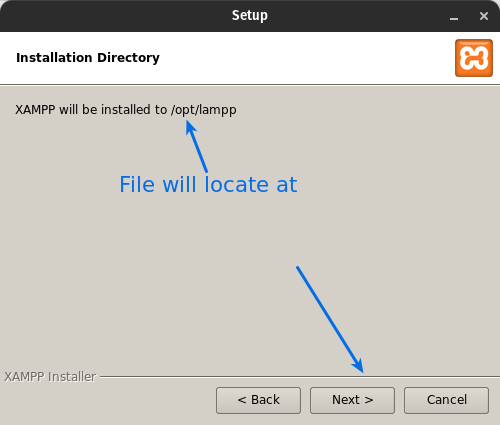
- The next process will show you where the software package will get install. To proceed ahead click on Next.
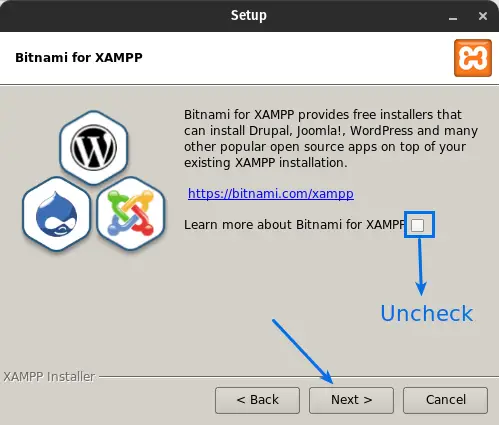
- Now you will ask you to install featured applications such as WordPress, Drupal Joomla, and other CMS applications.
If you want to install this CMS application alongside, go to the mentioned link and download the respective module as per your need. This concept is out of the scope of this article. So I’ll uncheck on Learn more about Bitnami for XAMPP and click on the Next button.
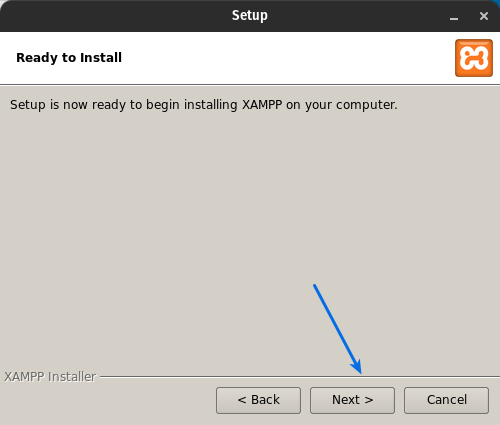
- This is the final setup screen click on the next button for the rest installation process.
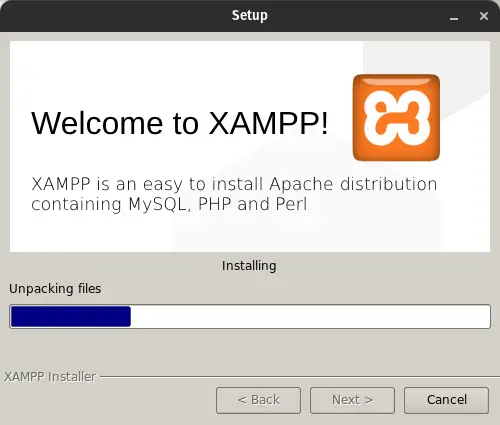
- Wait for a few minutes to complete setup.
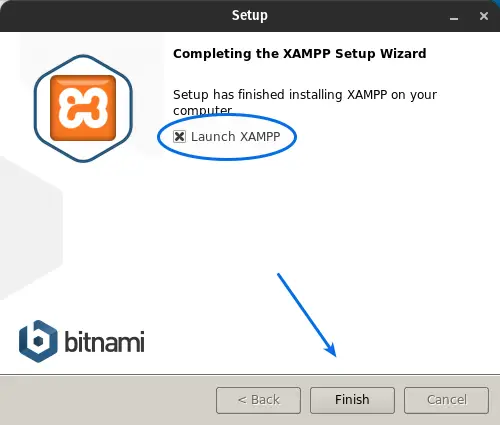
- Finally installation is completed. Click on the Finish Button to Launch XAMPP Server.
Step 4: Basic Configuration on XAMPP Server
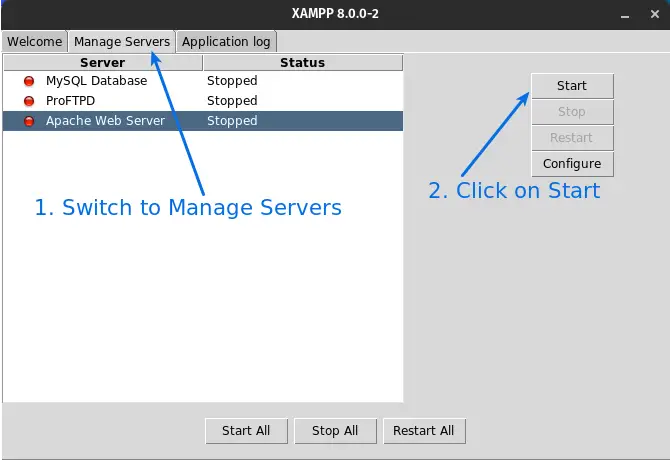
In this step, we will enable Apache Web Server. By default, all the servers are stopped. You need to start all the servers manually.
Click on Manage Servers. After that, click on start, follow the same for rest, or else you can click on Start All.
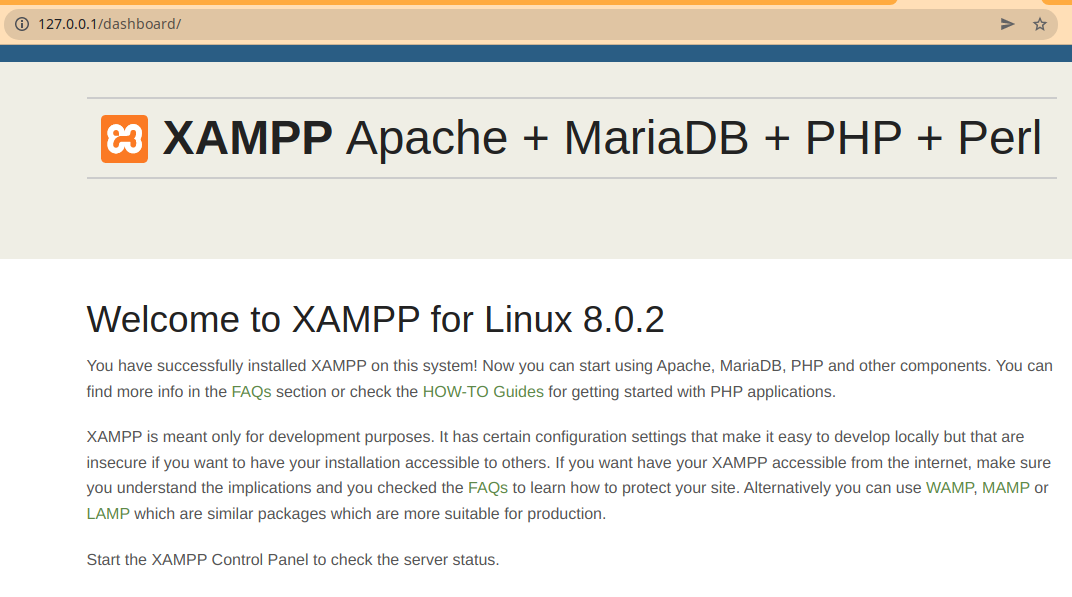
Your XAMPP server setup for Ubuntu is almost completed. Just wait for a moment to start all servers. Once it is done, you can check the localhost page for confirmation.
Read this :- How to fix MySQL port 3306 already in use error on XAMPP or if it does not start.
How to access localhost page
Once you complete the above procedure, go to the localhost or 127.0.0.1 to find a XAMPP Webpage and for PhpMyAdmin.
Once the page loaded, I was curious where the exactly index.php is stored. If you too, then go to the htdoc/opt/lampp/htdocs .
How to create Desktop shortcut for XAMPP
We are almost done here. For better accessibility to the XAMPP server will create a .desktop shortcut. For that, you can refer to our post How to create .desktop shortcut Icon to App Manager in Linux.
How to Uninstall XAMPP
From the above step, you know how to install XAMPP, but you should also know how to uninstall the XAMPP server too.
An uninstalling process is very simple. You just need to pass a few commands, and XAMPP is uninstalled from your ubuntu system.
To Uninstall the XAMPP server, you need to open a terminal and go to the installation directory. /opt/lampp.
$ cd /opt/lamppThe next step is to pass a series of commands to uninstall XAMPP completely from your Linux system.
$ sudo ./uninstall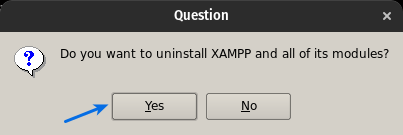
To remove any left configuration file on /opt/lamp type command.
$ sudo rm –r /opt/lampWrap up
I think so we are able to guide you on How to install and uninstall the XAMPP server on Ubuntu 20.04 L.T.S. and Debian11.
If you are facing any issue while installing or configuring, Please comment Down below, and we are ready to help you.
I just installed XAMPP on my Ubuntu 16.04 server. It was really easy and I’m really happy with the results. Thanks for the great tutorial!
I just installed XAMPP on my Ubuntu 16.04 server. It was really easy and I’m really happy with the results. Thanks for the great tutorial!